Gutenberg Block Editor
Gutenberg is a WordPress block editor that was first introduced in December 2018, replacing WordPress TinyMCE and over time it became part of the core WordPress software.
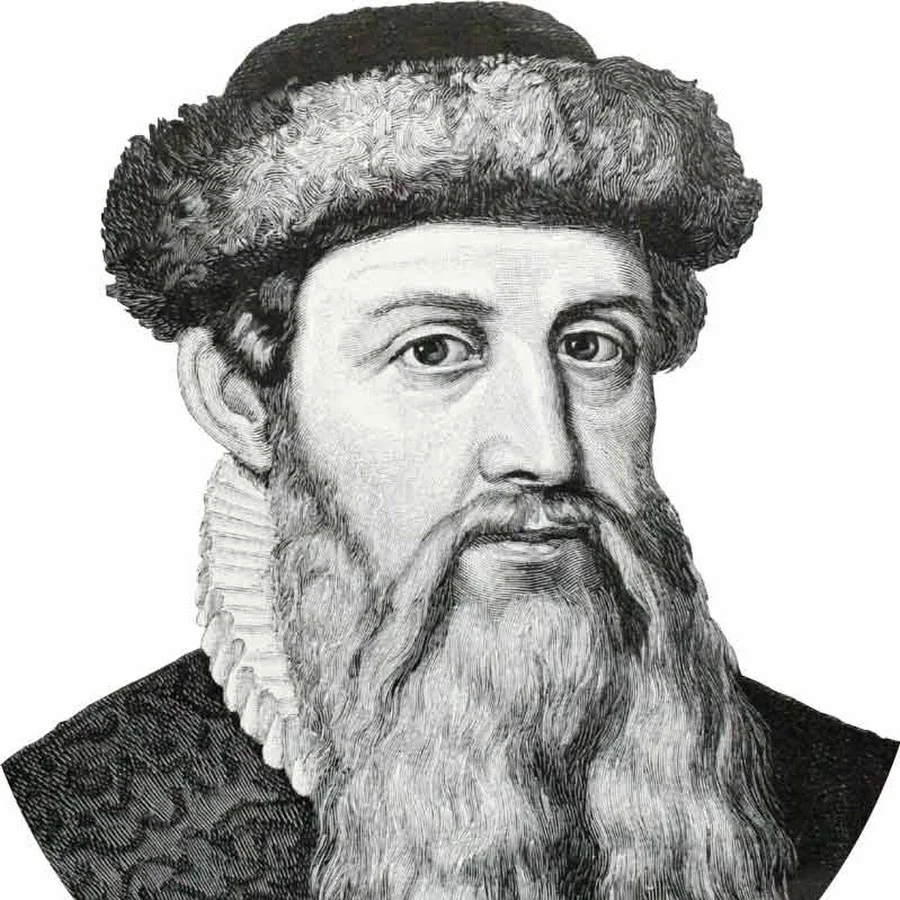
It is named after Johhann Gutenberg, the first German printer, who in the 1440s created a method of printing movable type.
The editor is built like a constructor and has a series of blocks for different types of content that include their own formatting options.
Creating publications or web pages in the editor is very intuitive. An empty screen serves as a host for your publication. All you have to do is add different types of blocks using the block insertion tool to add different content.
The Gutenberg Block Editor consists of three main parts:
.
Top toolbar
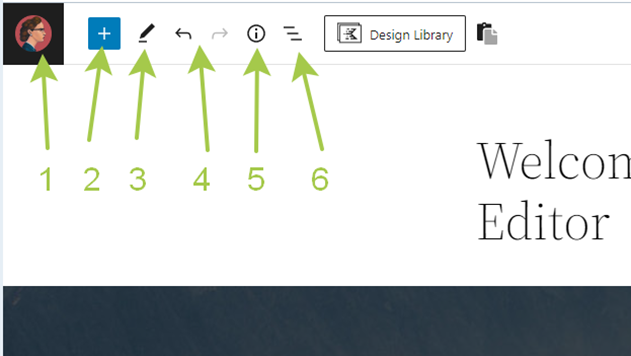
1.View Posts – the button to return to the WordPress admin page.
2. Toggle block inserter – when clicked, we get a list of all available blocks and patterns.
3. Tools – to select the interaction with the blocks on the page: select or edit the block. If the edit option is active, then when selecting a block on the page, we immediately switch to editing mode. To return to the block selection, press “Escape”; to return to editing again, press “Enter”.
4. Undo, Redo – Using these buttons, you can cancel an action or repeat the canceled action.
5. Details – shows the number of characters, words, headings, paragraphs, and blocks used.
6. List View – shows a list of all used blocks.
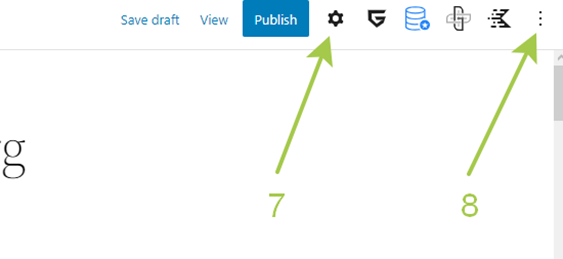
7. Settings – displays the side menu of the page settings.
8. Options – when clicked, the viewing settings, editor style, and additional tools appear.
2. Toggle block inserter – when clicked, we get a list of all available blocks and patterns.
3. Tools – to select the interaction with the blocks on the page: select or edit the block. If the edit option is active, then when selecting a block on the page, we immediately switch to editing mode. To return to the block selection, press “Escape”; to return to editing again, press “Enter”.
4. Undo, Redo – Using these buttons, you can cancel an action or repeat the canceled action.
5. Details – shows the number of characters, words, headings, paragraphs, and blocks used.
6. List View – shows a list of all used blocks.
7. Settings – displays the side menu of the page settings.
8. Options – when clicked, the viewing settings, editor style, and additional tools appear.
Settings Sidebarar
Clicking on the Settings icon in the top menu opens the Guttenberg Editor’s side menu.
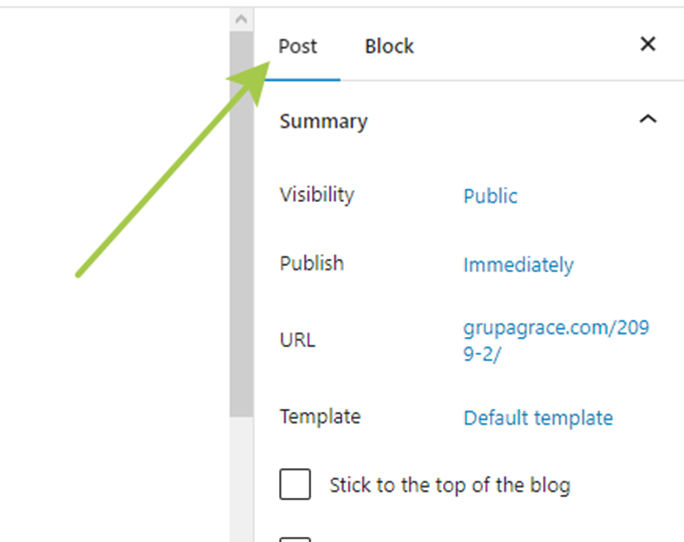
The menu displays two tabs Post (parameters of the entire post) and Block (parameters of the selected block).
For the Post as a whole, this is: Visibility, publish, URL, Template.
Here you can add tags and categories, change and track the status of the post, add images to favorites. These options apply to the entire page.
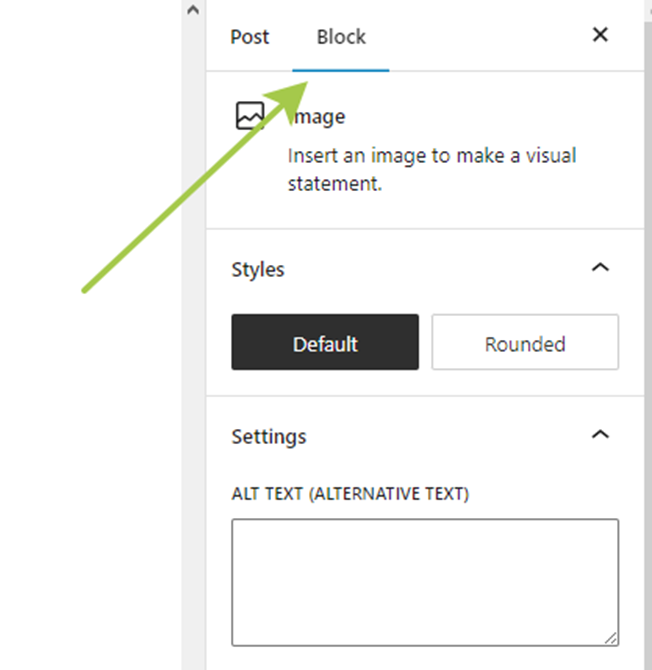
When you click on the “Block” tab, the parameters of the selected block will appear in the settings sidebar.
Content
This is the section where the blocks are placed. It takes up most of the screen.
The block can be added in 4 ways:
1. Click the “+” icon on the side of the empty block or the “+” icon in the upper toolbar.
The block can be added in 4 ways:
1. Click the “+” icon on the side of the empty block or the “+” icon in the upper toolbar.
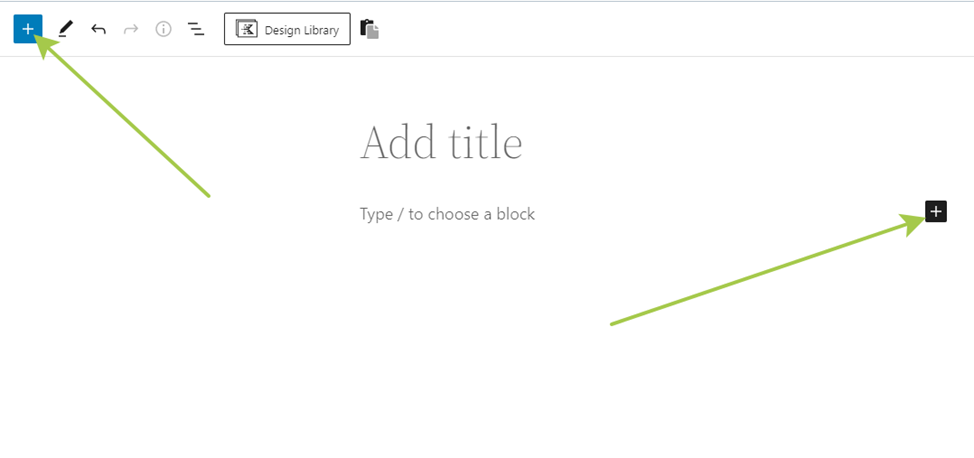
2. Press the “Enter” key while in the selected block to create a block under it.
3. Click on the three dots above the selected block. You can choose where to add a new block (above or below the current one).
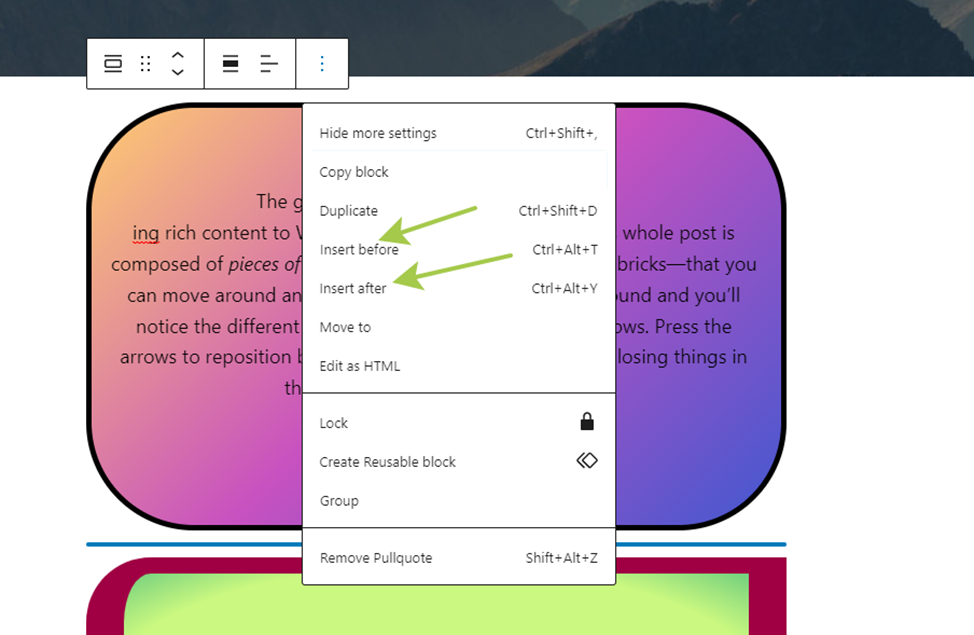
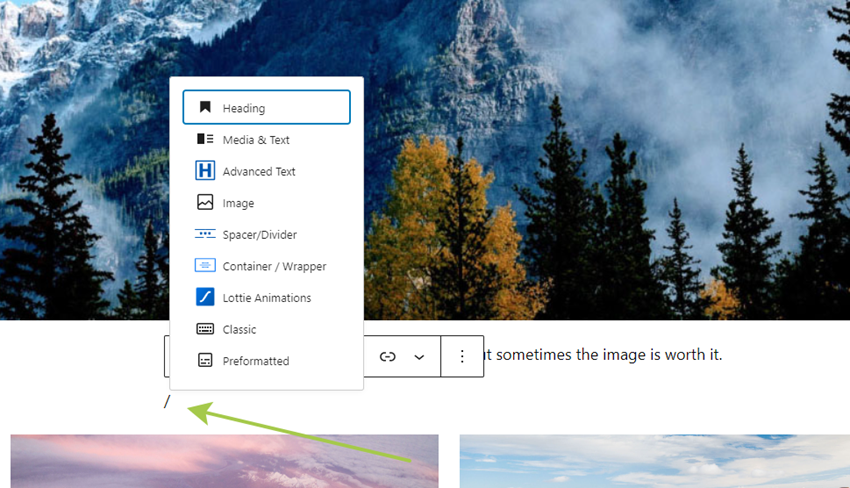
4. Enter the slash character (/) in the page editor, and this will open a small drop-down menu of blocks that can be added.
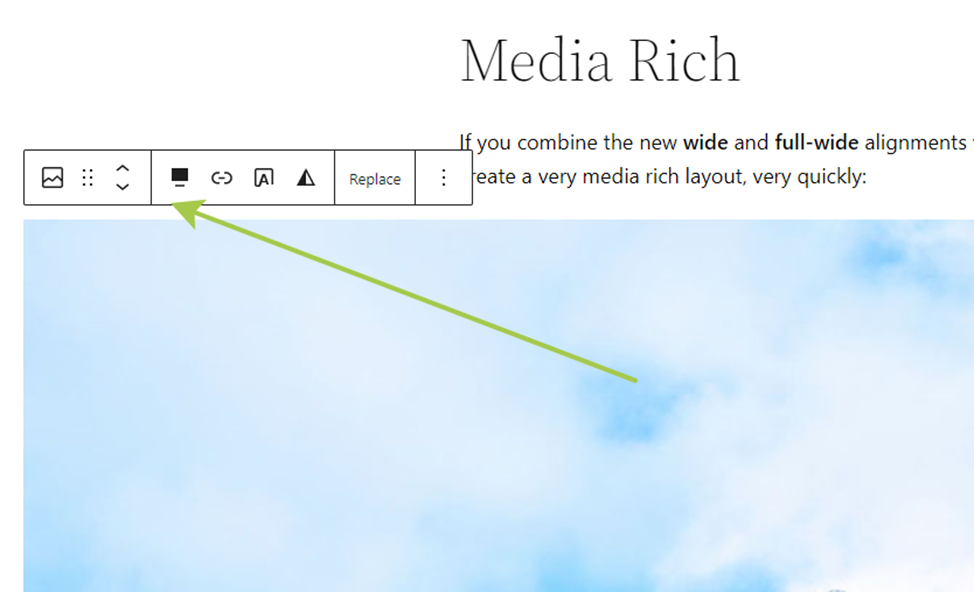
Each block consists of a block toolbar, a block settings sidebar, and block contents.
To find the settings of a specific block, you need to click on it. A toolbar opens at the top of the block. You can use it to select the basic formatting options.
To find the settings of a specific block, you need to click on it. A toolbar opens at the top of the block. You can use it to select the basic formatting options.
Tips for more convenient use of the editor.
✅Drag and drop images from your desktop.
In order to add an image to a post, it is not necessary to upload it to the gallery. You can simply drag the image from the desktop or copy it and paste it to the place where you want to add it.
If you need to add a lot of images, then this method will help you save time.
✅ Pin the formatting toolbar.
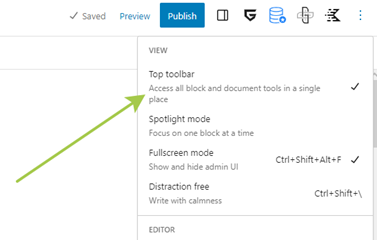
If you don’t like how the formatting tool is positioned above the block, the editor includes a feature that allows you to pin it under the top toolbar. To do this, go to the “Options” section and click the “Top toolbar” option.
In order to add an image to a post, it is not necessary to upload it to the gallery. You can simply drag the image from the desktop or copy it and paste it to the place where you want to add it.
If you need to add a lot of images, then this method will help you save time.
✅ Pin the formatting toolbar.
If you don’t like how the formatting tool is positioned above the block, the editor includes a feature that allows you to pin it under the top toolbar. To do this, go to the “Options” section and click the “Top toolbar” option.
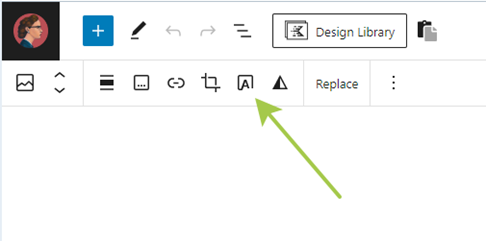
✅ Use keyboard shortcuts.
If you press Shift + Alt + H (for Mac Option + Control + h), you will open a list of all keyboard shortcuts that can be used in the Gutenberg block editor.
If you press Shift + Alt + H (for Mac Option + Control + h), you will open a list of all keyboard shortcuts that can be used in the Gutenberg block editor.
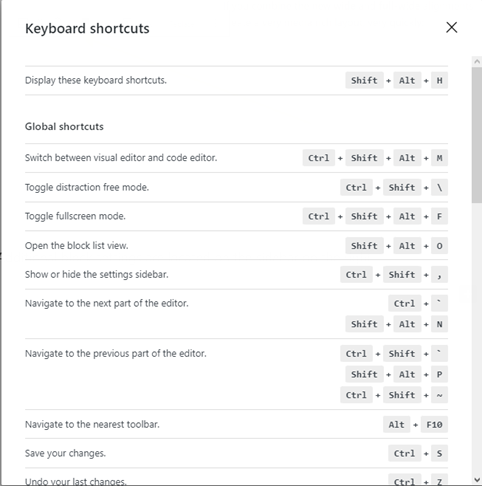
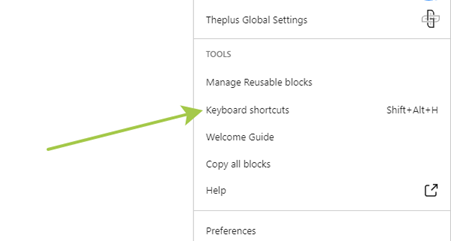
You can also find it by going to the “Options” section.
✅ Use block templates as templates.
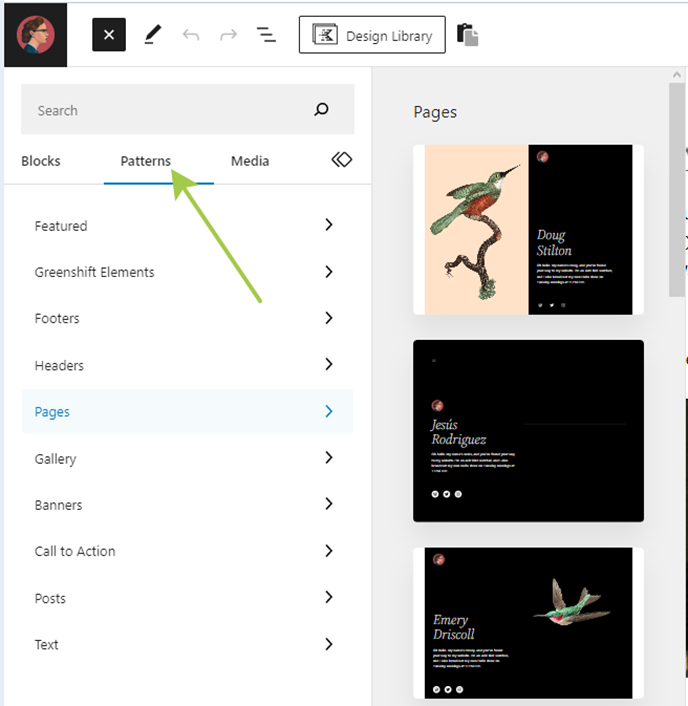
You can always use ready-made Gutenberg editor block templates by clicking on the “Patterns” tab.
You can always use ready-made Gutenberg editor block templates by clicking on the “Patterns” tab.
✅ Add an anchor.
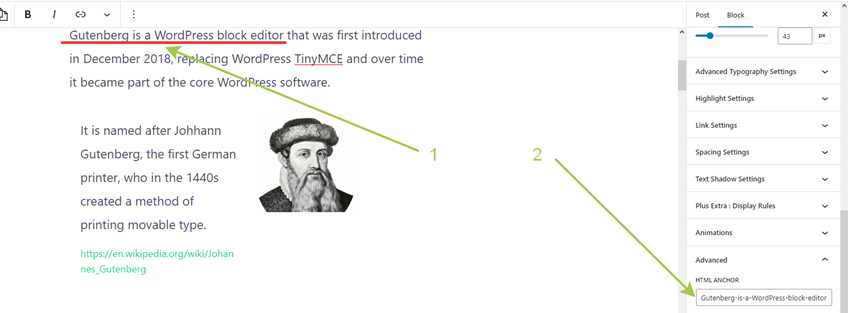
An anchor is a special feature that allows you to create links to specific sections of your content.
1. Select the area to which users will be redirected when they click on the link. To do this, enter the title text in the Advanced tab.
An anchor is a special feature that allows you to create links to specific sections of your content.
1. Select the area to which users will be redirected when they click on the link. To do this, enter the title text in the Advanced tab.
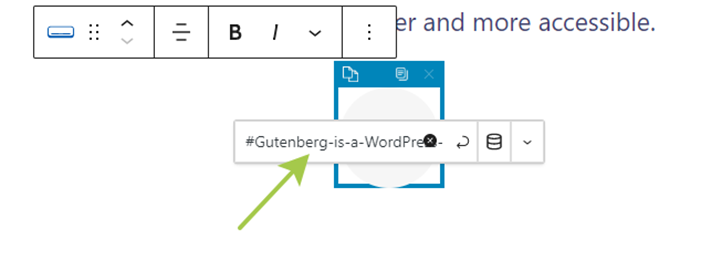
2. Create the link itself to navigate through the page.
To do this, enter the text, add an image or a button that your visitors will click.
Next, in the toolbar of this block, select the links option and enter the selected HTML ANCHOR starting with #
You can learn more about the Gutenberg block editor by watching the video below.
We can say that the Gutenberg block editor really became a breakthrough. Although some users still prefer the old editing method. In general, this can be considered a successful update that significantly expanded the functionality of WordPress and made website development easier and more accessible.